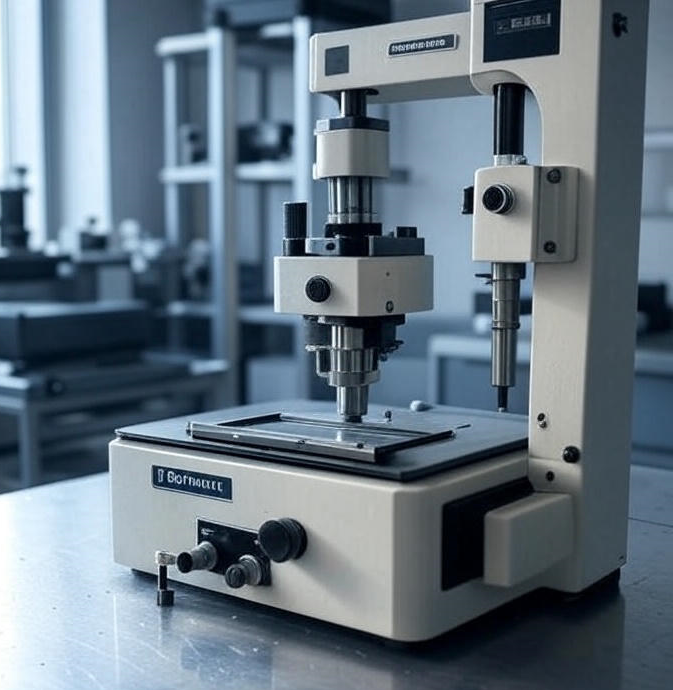
How to Calculate Hardness: Rockwell & Durometer Methods Explained
Hardness is defined as the “resistance of a material to deformation” particularly permanent deformation, indentation or scratching.
Unit: Rockwell Hardness – Number reading in M, L or R scales
Durometer Hardness – Number
Types: Following are some of the method used for measuring the hardness of plastics–
Shore durometers: These tests measure the depth of penetration under load when a hardness steel indenter is forced into a surface by calibrated spring. They are mainly two Types- Shore-A & Shore-D
Rockwell hardness tester: Rockwell hardness number is not a measure of total indentation but of the non-recoverable indentation after a major load applied for 15 seconds is reduced to a 10 kg minor load for 15 seconds. Measurement is made from the increase in depth of impression when load on a ball indenter is increased from a fixed minimum to a specified maximum then returned to the minimum load.
Barcol Tester: Barcol tester is a hand pressed one with a spring loaded plunger. The indenter is a frustum of 26 cone with flat tip 0.0062 inch surrounded by concentric sleeve. The indenter is mob and hardened steel. The hardness value is the initial highest dial reading.
Brinell Hardness method: The brinell test for plastics generally used loads of 500 Kg and a 10 mm diameter steel ball applying the load for 30 seconds; the specimen should be 0.125” thick.
For more details : Watch our podcast on How to Calculate Hardness: Rockwell & Durometer Methods
Significance:
1. A Rockwell hardness number is a number derived from the net increase in depth impression as the load on an indenter is increased from a fixed minor load to a major load and then returned to a minor load. Indenters are round steel balls of specific diameters. Rockwell hardness numbers are always quoted with a scale used. This test method is based on test method E18. Each Rockwell scale division represents 0.002-mm (0.00008in) vertical movement of the indenter.
2. A Rockwell hardness number is directly related to the indentation hardness of a plastic material, the higher the reading the harder the material. Hardness number is equal to minus the instrument reading. Due to a short overlap of Rockwell hardness scales, two different dials reading on different scales are technically correct.
Rockwell Hardness

Rockwell hardness number derived from the net increase in depth impression as the load on an indentor is increased from a fixed minor load a major load and then returned to minor load.
Test Methods: ASTM D 785, ISO 2039, JIS K 7202, DIN 53426
Specimen Dimensions: Smooth flat sheet of 25 x 25 x 6
Test Procedures:
The specimen is placed on the anvil of the apparatus and minor load is applied by lowering the steel ball onto the surface of the specimen.
The minor load indents the specimen slightly and assures good contact.
The dial is adjusted to zero under minor load and the major load is immediately applied by releasing the trip lever.
After 15 seconds, the major load is removed and the specimen is allowed to recover for an additional 15 seconds.
Lastly, the hardness test remains a key indicator in material selection for engineering applications.
It is essential for ensuring quality control in manufacturing processes.
In summary, the knowledge of hardness test techniques is fundamental to materials evaluation.
Overall, mastery of hardness testing methods is vital for engineers and material scientists.
Thus, ensuring precision in the hardness test will lead to better material performance assessments.
Understanding these factors is crucial in accurately conducting hardness tests and interpreting results.
Rockwell hardness is read directly off the dial with the minor load still applied.
Durometer Hardness
Test Methods: ASTM D 2240, ISO 868, JIS K 7215, DIN 53505.
Specimen Dimensions: minimum 3mm thick sheet
Conditioning: Test specimen is conditioned at 23 ± 2°C and 50 ± 5% relative humidity for not less than 48 hours
Test Procedures:
1. The test is carried out by placing specimens on a hard flat surface.
2. The pressure foot of the instrument is pressed onto the specimen, making sure that it is parallel to the surface of the specimen.
3. The durometer hardness is read within 1 second after the pressure foot is in firm contact with the specimen.
4. Two types of durometers are most commonly used – Type A & Type D.
5. The difference between the two types is the shape and dimension of the indenter.
Type A durometer is used for soft material.
Type D durometer is used for hard material.
Factors Influencing:
1. Temperature of testing: The hardness is inversely proportional to the Temperature.
2. Humidity of Environment: The hardness is inversely proportional to the Humidity level in moisture sensitive material.
3. Effect of Reinforcing Filler: The hardness is directly proportional to the loading of Reinforcing Filler.
4. Surface Conditions of the specimen: Surface finish has significant effect on the Hardness results. 5. A smooth moulded surface yield higher value than a machined surface.
6. An-isotropy: Plastic material with the An-isotropic characteristic may cause indentation hardness to vary with the direction testing.
Conclusion :
One important characteristic of a material that indicates its resistance to localized plastic deformation is its hardness. There are several ways to test for hardness, and each has pros and cons of its own. The specific application, the material being tested, and the required level of accuracy all influence the method selection. Engineers, materials scientists, and manufacturers must have a thorough understanding of the variables influencing hardness and the uses of hardness testing. In order to create dependable and long-lasting products, hardness testing is essential for material selection, quality assurance, and performance forecasting.


Post Comment